

Welcome to Gsmedge
Today's lesson is to explain the workings of the ROOT for the Galaxy A5 Pro (2017)
- Model Support
- SM-A520F
- SM-A520FN
- STEP BY STEP

2. COPY (Super SU & no-verify-opt...) On SD CARD..

3. Turn off the phone was directed to the download mode (ODIN MODE)
(HOME BUTTON + VOL DOWN + POWER)
AFTER BOOT ODIN MODE CLICK > VOLUM UP


4- to attach the phone to the computer
5- Go directly to the Root Files Open the Odin program
6- Click On Ap And Select Twrp Recovery And Click Start (Wait)
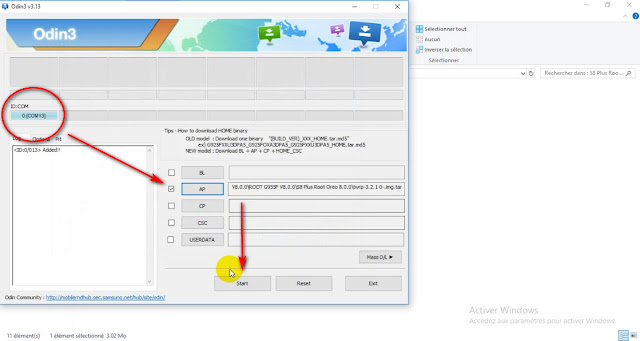
7- After clicking the START button, wait 5 seconds. Tap the
Move Recovery mode before the phone is switched on
(volume up button + bixby button + power button)

COMPLETE TUTORIEL
