ROOT GALAXY SM-G950F/FD G955F/FD V9.0
- Warning / Before following this topic
- Read all steps very carefully. We are not responsible for any damage if the steps are not followed correctly.
- This topic is exclusively for the Galaxy phone S8 & S8 Plus / Model SM-G950F & G955F / Android version for Pie 9.0 All Binary
- Note that the installation of the routine eliminates the warranty, aerodrome updates and the Knox feature.
- Take a backup of your phone to avoid losing your files if an error occurs.
- Charge your phone above 50%.
- Use the original USB cable supplied with the phone, and do not remove the cable during installation.
- Illustrations may vary slightly as a file name difference.
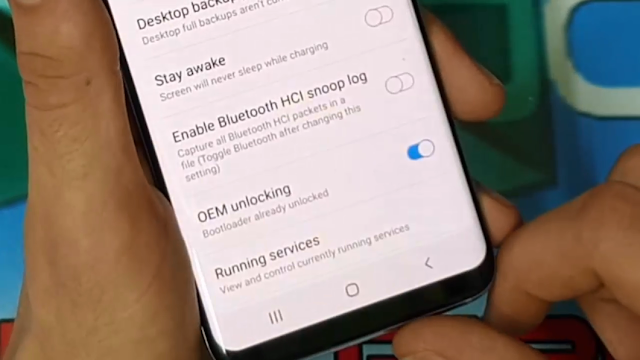
- Go to: [Settings> About Phone> Build Number] and press it repeatedly until you say you are a developer. Now from the developer options: Enable the Enable OEM Unlock option and the USB debug mode.
- STEP BY STEP
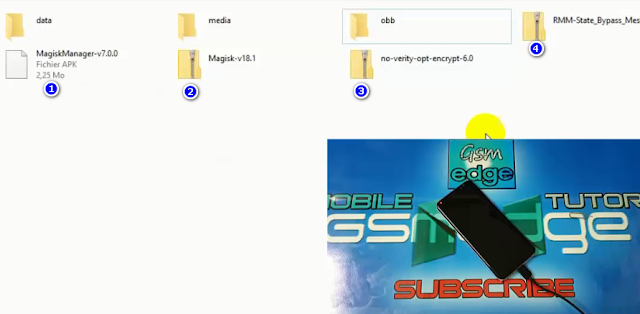
2. COPIER ROOT FILE ON YOUR SD CARD
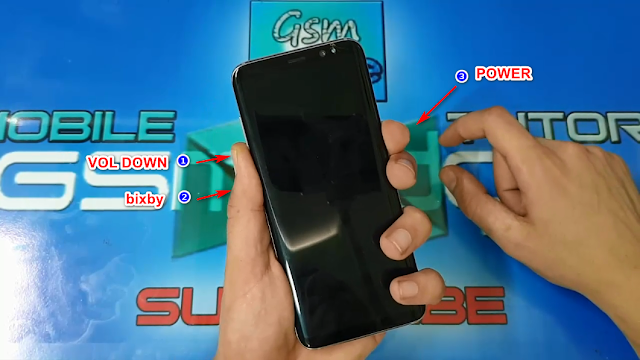
3. TURN OFF YOUR MOBILE AND RUN ODIN MODE
4. CONECT YOUR S8 OR S8 PLUS AND OPEN ODIN
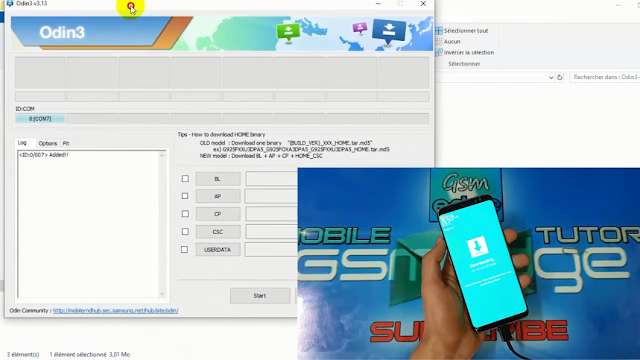
5. CLICK IN AP AND SELECT TWRP RECOVECY AND CLICK START
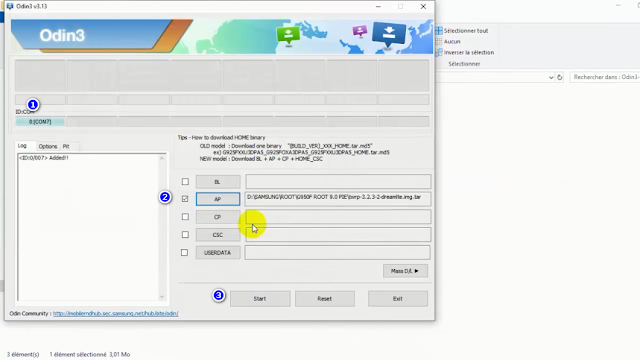
6. AFTER PRESSING THE START BUTTON, WAIT FOR THE PASSMARK BUTTON. DO NOTE LEAVE THE PHONE ON AUTOMATICALLY INSERET THE PHONE INTO \ TWRP RECOVERY MODE DIRECTLY.


7. Leave the POWER button down and press the rest until TWRP RECOVERY takes off
COMPLETE ON VIDEO TUTORIEL
DOWNLOAD LINK
TWRP G950F/FD - HERE
TWRP G955F/FD - HERE
Magisk-v18.1.zip - HERE
MagiskManager-v7.0.0.apk - HERE
no-verity-opt-encrypt-6.0.zip - HERE
RMM-State_Bypass_Mesa_v2.zip - HERE


No comments:
Post a Comment